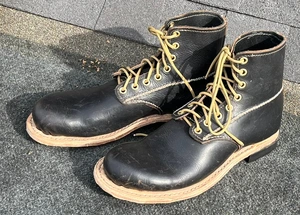
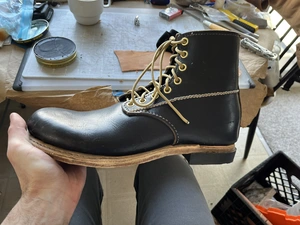
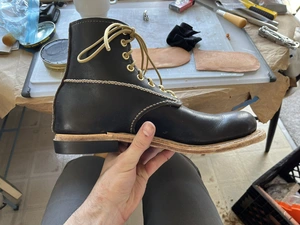
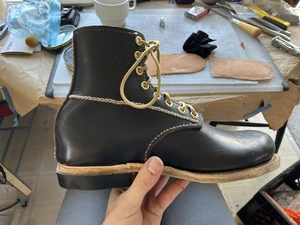
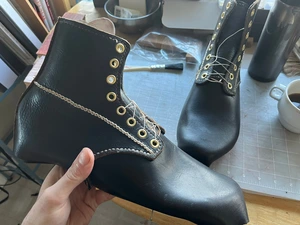
Overall
| Design | Ankle-Height Work Boot |
|---|---|
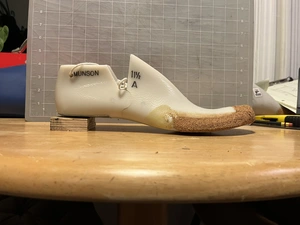
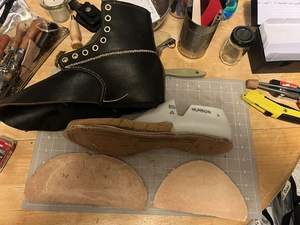
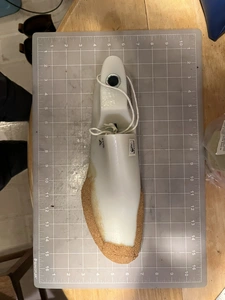
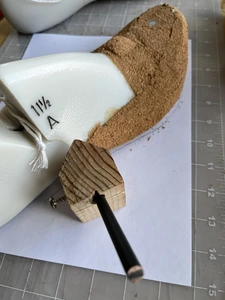
| Last | Built-Up Munson 11½A from Sorrell Notions and Findings |
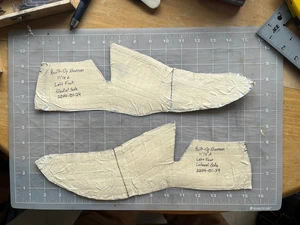
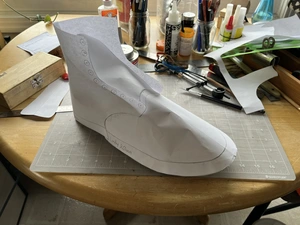
| Pattern | Original, From Tape Last Forms, Fully Lined, Symmetrical |
| Closing | Hand-Sewn Saddle Stitch |
| Construction | Hand-Sewn 270° English Welt |
| Timeline | January to March, 2024 |
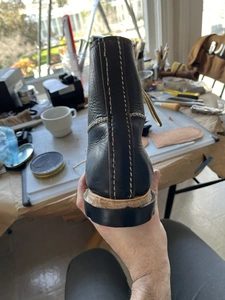
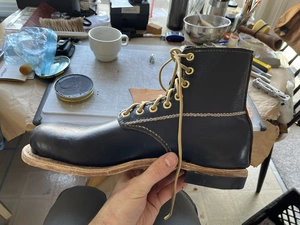
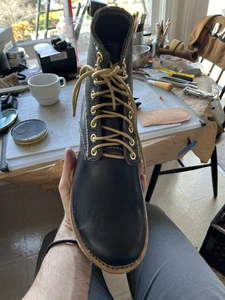
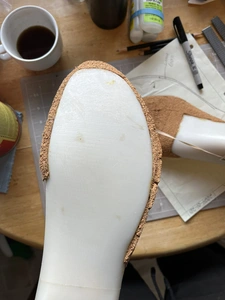
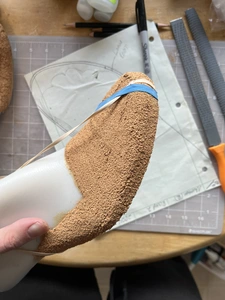
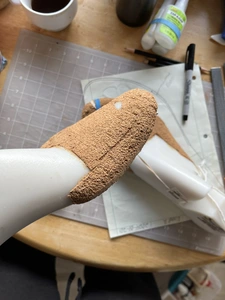
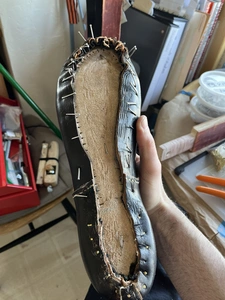
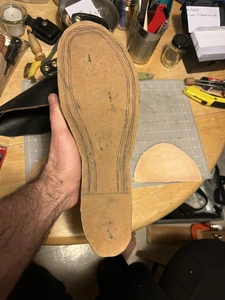
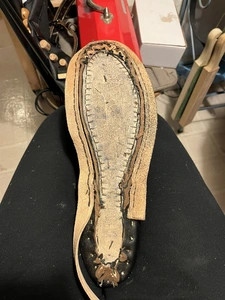
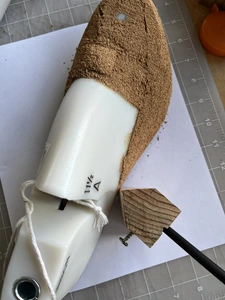
Photos


Thanks
In no particular order, and doubtless incomplete:
- Lisa Sorrell, for guidance, provisions, and tutorial videos
- Nicks Boots, for making videos
- Dennis Kieback of Kustom Kraft, for making videos
- Marcell Mrsan, for instructional videos
- Steve Doudaklian of Bedo’s Leatherworks, for making and repair videos
- Harry Rogers, for book and tutorial videos
- Vincent of Kpomo Bespoke, making and tutorial videos
- the late D.W. Frommer II, for digitizing books
- Bill Bird, for words of encouragement and tutorial videos
- White’s Boots, for making videos
- Carréducker, for blog posts and videos
- Lu_shoemaker, for making videos
- Siroeno Yosui, for making videos
- Tony Slinger, for tutorial videos
- Kirby Allison, for bespoke foot measurement videos
- Kazuma Nishimura, for making and tutorial videos
- Nigel Armitage and Armitage Leather, for stitching tutorial videos
- Ian of Leodis Leather, for stitching tutorial videos
- Chuck Dorsett of Weaver Leathercraft Supply, for tutorial videos
- several helpful, pseudonymous denizens of the stitchdown.com Discord server’s #cordwaining channel
- equally helpful members of /r/cordwaining on Reddit
Thoughts
An enormous learning experience. My hands hurt and my apartment is a disaster. I’ve a whole stack of notes to pull together for the next pair.
In the end, these aren’t going to be wardrobe champions. The creasing—I should really say folding—of the loose vamps over the balls looks horrific. But the fit elsewhere was a revelation. I think I said “oh, Lord” three times in disbelief right after putting them on. That’s not a thing I usually say.
I spent weeks and weeks looking forward to this pair. But more or less as soon as I got far enough to call them “made” and try them on, my mind shifted entirely to the next pair. There’s a massive number of relatively small, clearly doable ways to improve from here, and doubtless more that I can’t yet see. I’ve taken the leap from watching others prove bootmaking is doable on video to living through actually doing it, and getting close to an end-product I would value.
Materials
| Upper Leather | Black Horween Chromexcel, Craft Grade, 10-year-old hide | The Hide & Leather House |
|---|---|---|
| Upper Lining | Black Pigskin Split from a Clearance Bin | Tandy Leather San Bruno |
| Eyelets | Brass, 3⁄16″ (5mm) (See note below.) | Tandy Leather Online |
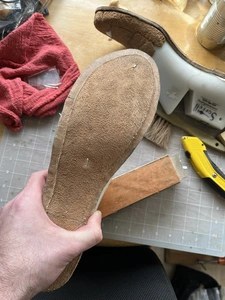
| Insole | Sole Bend (See note below.) | Montana Leather |
| Filler | Cork Sheet, ¼″ | Amazon |
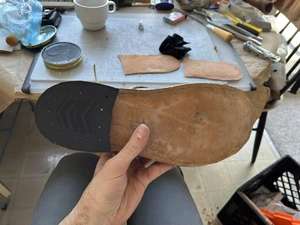
| Outsole and Shank Cover | Leather Sole Bend | Montana Leather |
| Outsole Cement | Barge All-Purpose Original (See note below.) | Amazon |
| Shanks | Unknown Manufacturer, Steel, A-3, 3 Ribs, 1x5½″ | Panhandle Leather |
| Upper Threads | Maine Thread Twisted Waxed Cord, 0.045″, White and Ecru | Maine Thread |
| Inseam and Outseam Thread | Maine Thread Pre-Made Taper, Poly, 7 Ply, .055, 72 | Maine Thread |
| Welts, Rands, Heel Stiffeners, Toe Puffs | Economy Veg-Tan Double Shoulder, 7-9 ounces | Tandy Leather Online |
| Drafting Tacks | D.B. Gurney 7 oz. Hand Shoe Tacks | Maine Thread |
| Lasting Tacks | 17 AWG Stainless Steel Brads, 1″ and 1¼″ | ACE Hardware and Home Depot |
| Seat Nails | D.B. Gurney Brass Clinching Nails, 5/8 and 7/8 | Sorrell Notions and Findings |
| Heel Nails | D.B. Gurney Rubber Heel Nails, 13 Gauge, 8/8 | Montana Leather |
Mistakes
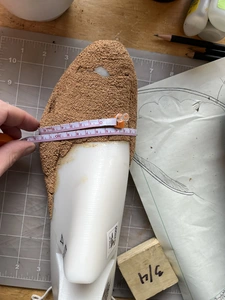
Toe Build-Up
I have now answered the question “could the toe of the Munson last get any worse?”.
My measurements required a bit of build-up over the ball, but my build-up over the toe was a naive attempt to improve the shape. To my eye, it didn’t turn out well.
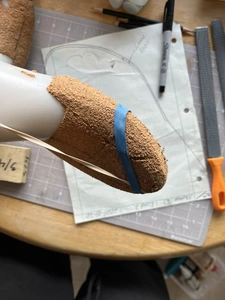
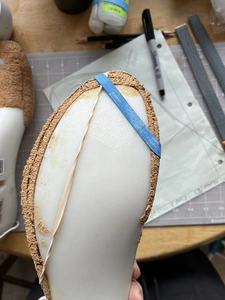
Cork Build-Up
I built up the balls and toes with cork. That made shaping pretty easy, if a bit of a mess. Unfortunately, it just didn’t seem strong enough for lasting over the built-up toe. The cork was essentially cantilevered out into free space, unsupported.
I tried to compensate for this by smearing epoxy paste over the cork. That made it just strong enough for lasting without completely cracking apart. It might also have contributed to poor results over the toes and balls.
Alas, despite a heft dusting with talc, the toe build-up in one of the shoes stuck in the toe of the upper on delasting. The other came out cleanly.
I’ve heard and read advice to build up with scrap leather instead. That will be easier now, with a fuller sole-leather scrap bag.
Not Enough Lasting Allowance
I somehow managed to leave too little lasting allowance over the toes. The allowance I had then began to fray under hard pulling.
Stiffeners Too Thick
I skived both heel stiffeners and toe puffs, but didn't leave enough thinned-out margin over the featherlines. This also contributed to bunching up and bad lasting over the toes.
Some sources recommend cementing the stiffeners to the outside channel of the insole before lasting the uppers. Others evidently do a better job of skiving than I did.
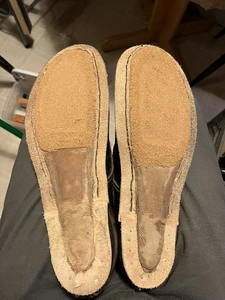
Not Lasted Tight Enough Over the Ball
I didn’t pull the uppers tight enough over the balls, especially at the vamp points. This led to oversized, floppy vamps that crease horribly.
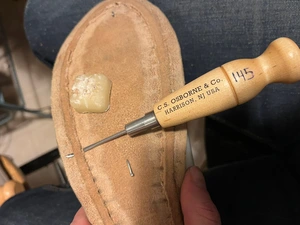
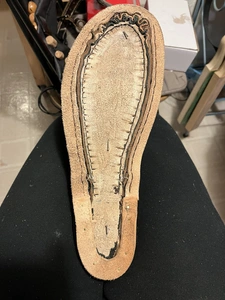
Wrong Inseaming Awl
I tried to make due sharpening up a C.S. Osborne No. 31 (3″) Flat Curved Awl Blade. Not great, especially through the outsole leather I used for the insoles.
Welt Too Tight Around Toe
Concerned about lasting the toe tight enough, I tried to use my inseaming stitched to help pull the material toward the holdfast. I also pre-pierced holes in the welt a bit short of where the awl was coming out to begin with. That might have improved the lasting situation a little bit, but it was still bad in the end. It also led to the welt sticking sharply up at the toe, rather than laying flat. It had to be hammered down over a cobblers’ anvil to cement to the outsole.
Nail At Seat
Looking really closely, a bit of brass clinching nail is visible under the seat of one of the boots, under the backstrap as it folds under the featherline. This seems to have disappeared after nailing on the Vibram heel, but wasn’t ideal.
I might try sewing the seat of the next pair.
Welt Stitching
To my eye, the welt is outseamed bit far away from the upper in a few places. I should have done more outsole trimming before marking the line for the channel. I intentionally cut the welt slightly wider than the 18 millimeters Marcell Mrsan recommended in one of his videos, but didn't remember to go back and trim off a millimeter or two all around after inseaming.
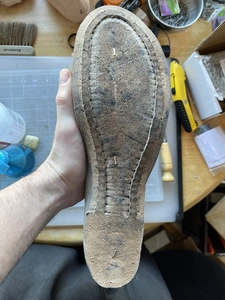
Wonky Outsole Channel
I incised the line for the channel at too high an angle, creating a small target for the awl and a thin flap. It doesn’t fully cover a number of outseaming stitches.
Wrong Eyelets
The eyelets from Tandy are easy to get, but visibly bigger than normal on shoes, and not terribly deep. I originally cut lining pieces for the backs of the facings, but had to leave them out to mount the eyelets.
I’ll be trying all-brass eyelets and hooks from Ohio Travel Bag next.
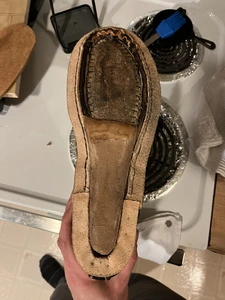
Wrong Insole Leather
I used outsole leather for the insoles. This made feathering and sewing much harder, and produced a hard, relatively inflexible insole in the end.
Cut-stock insoles are actually available, from Keystone and Baker through Sorrell or direct from Panhandle.
Cement
Barge Original is classic, dependable stuff, but also a pretty harsh organic-solvent-based formula. There are health concerns about the toluene it contains. Barge itself now offers toluene-free versions. There are likely better options out there, including water-based contact cements like Renia 315.
Hirschkleber
This product was mentioned again and again in guides and tutorials. I ended up paying for a jar. It’s not cheap, and I’m bothered not knowing what’s in it. Whatever it is—I’m guessing starch an some preservatives—it’s not magic.
I’d like to find a cheaper, more readily available alternative. I'll likely try PVA or starch-based wallpaper paste next.
Tapers
Even the longer 72-inch tapers from Maine Thread weren’t long enough to sew all the way around these boots. I ended up splicing in a second thread on the first pair and knotting two tapers together to sew the second.
I’d like to try making my own next time, likely from hemp, since I no longer seem to be able to find linen. Lisa mentioned she now sells longer pre-mades, as well.
Nicks and Scuffs
The leather had some blemishes before I cut it, but I definitely made some new ones. I nicked the backstay of one book while trimming the rand. I first noticed some scratches over one of the vamps during lasting, and can’t remember when they might have happened. I cut a scrap of leather to put between the awl and the uppers while outseaming, but never got into the rhythm of using it. It was always falling off the shoe, and sometimes I did without.
Pattern Overlaps
I was able to get the various pieces of my patterns lined up right for closing, but it took a lot longer than it should have without alignment marks.